As we have come to the end of our media journey I have learnt a lot throughout the process of planning and making the products. I have really enjoyed making a music video for my A2 project, I have used all the key aspects that I learnt last year and used them this year to make a product that is better and I made it on my own which meant that I had complete control over the creative process. I am happy with the final outcome of my music video.
Thanks for reading my blog I hope you have enjoyed seeing my progression throughout the whole process.
Jess Awdas
Thursday, 11 May 2017
Wednesday, 10 May 2017
How Did You Use Media Technologies In The Construction, Research and Planning And Evaluation Stages?
From making my product to making my ancillaries I have used
a wide range of different media technologies in order to help me plan my
products, make my products and evaluate it all. Media technologies have really
helped me to expand my knowledge and make them the best that they can be.
Research and Planning
The main media technologies that I used for this section of
my product making was web 2.0 this is essential the internet and by using the
internet it allowed me to get a better idea of what I wanted to create and
allowed me to use and adapt other peoples ideas. I firstly started of using
YouTube to find out more what student music videos and short films look like,
this really helped me decide which video I wanted to create, I looked at
various different video to give me an idea what I could do on a very low budget
film. I thought that it would be better for me to make a music video because I
was working on my own I thought that this way I wouldn’t have to sort out
equipment for sound because it would just be the soundtrack and also this would
be time consuming and I was working on my own. I then expanded my knowledge by
looking at other music videos on YouTube to give me an idea of what I could use
in my video. I deconstructed many different music videos like the Bastille
Oblivion music video, which I used the idea of going again the conventions of a
male singing and they used a female as the main protagonist, which is what I
used for my video. I also used pinterest to generate costume ideas for what my
main protagonist could wear. I also made
a pinterest page on shots that I could use throughout the video this helped me
to start thinking about a storyboard and what shots I wanted to include. I then
went on to making a animatic which is essentially a storyboard of photos but
its put into a video so that it gives you a better idea of how it might look
before going out and filming it. I thought this was very helpful for this task
I used Premiere pro in order to make the video.
The making of the film.
In the making of the film I used my Canon 100D camera in
order to shoot the film. i thought that this camera was really good for what I
wanted it for it was easy to use and it was easy to transfer the footage onto
the computer.
I did all of the editing of the music video on Premiere Pro
this allowed me to have many different settings and effects that I could paly
around with making my video better and more eye catching. When editing the film I tried to use my
animatic to help me edit but my ideas had changed a lot so I had that as a back
up and just edited the way I thought it looked better. Because Premiere Pro has many different
effects it allowed me to make the drumming sequence more vibrant by changing
the colour and saturation of some of the shots so that they contrasted each
other really well. I also used Adobe encoder in order to export my video. This
meant that I could show people my video throughout different stages of the
filming and editing. This allowed me to get feedback from my target audience to
make my video better and more tailored to my target audience. I uploaded my
videos to YouTube so that I could embed it onto my blog and this also meant that
they public could see my work and leave a comment.
Evaluation
For the evaluation process I used different media
technologies to show what I had learnt throughout the process. I used sites
such as Emaze, Prezi and wordle to show what I have learnt about the process and
what convention I used and how I made my final products. I also used blogger to
show the development process throughout the making of my products. I thought
that by doing a blog alongside making my main product it meant that I could
refer back to the posts making the evaluation question easier to write about. I
think that by using different media technologies it has allowed me to be more
creative and have more of an idea of what my product might look like when
finished. I think that the key point was using Web 2.0 for researching the task
and making the evaluation questions.
Sunday, 30 April 2017
Thursday, 27 April 2017
Evaluation Question 2- How effective is the main combination of your media product and ancillary tasks?
I think
that my media product and ancillary tasks link together and look very effective
and memorable. The idea was to makes sure that both the product and the
ancillary tasks were unique and memorable. To keep them both
consistent I used the same effect on both the products and made
sure that my main protagonist was a key aspect of my main media product
and my ancillaries. I think that by having the main protagonist really
emphasized on both if the products it puts a familiar face for the audience
to identify.
I had to
organize a photo to get some shots for my ancillary tasks; I wanted my main
protagonist to be wearing similar clothing as to the shoot at the forest and
the main hall shot. It was key that she wore dark clothing so that it helped to
emphasize the darkness and the danger that she was in. I took some of the
photos when filming the forest scenes. I had a separate day for the shooting in
the main hall and the photo shoot so I had to make sure that my main
protagonist was wearing the same clothing so that it fitted together. The
lighting for both of the shoots that I had were differently done when filming
in the forest I used natural lighting and in the main hall I used artificial
lighting to create an effect of shadows around and on the main protagonist. It
really helped me making the ancillary task alongside making the actual video
because it meant that I could reflect the ancillaries to the way I was editing
my main video. This meant that my ancillary tasks and main video were pretty
similar.
Below is some of the photos from my shoot:


Research
When
making my ancillary tasks I had to start of by researching both a digi pak and
music video posters. I thought that by researching some ideas it made it easier
for me to generate ideas. It also meant that I could see what was done in the
past and use and adapt their ideas to make my own. Because I already do
Photography A2 I knew how to use Photoshop, which meant that it was a lot
quicker for me to edit the photos and it meant that I could play around more
with the different effects. I looked at many different music video posters; I
also looked at just black and white posters because my film is mostly in black
and white and I thought that by carrying this out on the digi pak and the
poster it would make more of a statement.

Codes and
Conventions
I used
some regular codes and conventions for my ancillary tasks. I used the same font
for both my digi pak and poster this helps to show that they are both linked. I
also used the same effect so the photos were in black and white and then it had
the trippy effect of the pink and blue colour layered into the photos. This
shows that all 3 of my products are linked and it is a very distinct effect.
From my research I found out that the audience wanted a clear connection
between all of the products made so that it was easier to tell that they were
all linked.
I used
the conventions of the person being alone in both my digi pak and my poster so
that it shows that the main protagonist is lost and alone. I also made the
photos in high contrast and darker to show that there is a darkness and this
shows that there is something she is hiding from because in the digi pak for
the front cover you can see half her face which could either infer that
something is taking over her or she is hiding from something.
This is my digi pak.

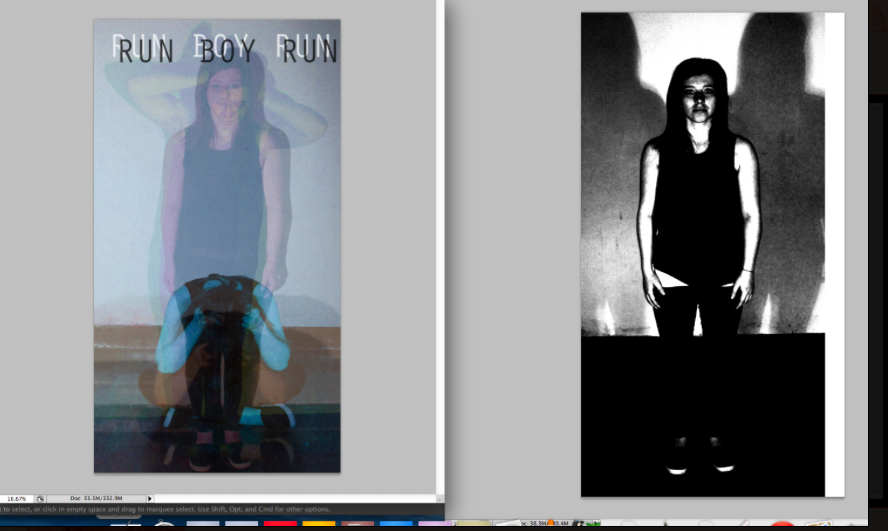
Poster
This is my final poster below.

Friday, 21 April 2017

Thursday, 20 April 2017
Feedback from my digipak

I have now finished my digipak and have shown it to my audience so that i could get some feedback, and to see whether they liked it. Below is the feedback i got from my audience:
*'I really like the way that you have used black and white I think that it makes it stand out. Also by having it in black and white it allows the colourful title to stand out from everything else'
* 'I think that the photographs that you have chosen are really professional, they are very clear and work well with the digipak'
* 'The title are really effective and they stand out which is good because thats what the audience are going to see when its on the shelves of a supermarket for example'
* 'It's cool'
* 'I really like the way that the photo's show isolation and that reflects the music video'
* 'Its clear from this digipak who the main protagonist is'
* 'I think that you could have added running shots on the inside
* 'It really reflects your music video through the use of the different colours with the black and white'
Digipak

Tuesday, 18 April 2017
Poster

Sunday, 16 April 2017
CD cover research

Saturday, 15 April 2017
Digipak research
 For part of my ancillary tasks i have to make a digipak for my music video. I didn't really know what a digipak was at the beginning so i research it on Google. These where the results that came back, i then went on to trying to find a digipak template so that it would make it easier for me to create my CD case.
For my digipak i am planning to use lots of different photo of my main protagonist. In the inside I wanted to uses close up shots of her face in black and white so that it makes it more dramatic and allows the viewer to concentrate on the main protagonists facial features. Also by using the black and white filter it connects and looks similar to my main media product. On the outside of the digipak I'm planning to have long shots of my protagonist, I don't want her facial features to be seen as much because it creates mystery but also by having long shots it shows how alone the main protagonist is. This is the message i am trying to get over to the audience throughout the music video.
Thursday, 13 April 2017
Researching music video posters....
I went to Google and typed in 'Music Video Posters' these are the results it came back with in the screenshot below. As you can see in the images below most of the ones that were picked up are very bold and dramatic, which is the sort of idea i want to go for. I think that because the music is very dramatic and heavily impacted by drum i think that by having a very dramatic poster it will reflect the music very well. I really like the way that the posters below like the 'Bad Blood' poster they have used a black and white photo of the main singer and then used red bold text to make it stand out.


Tuesday, 4 April 2017
Researching students music videos

Wednesday, 1 March 2017
Feedback from my poster ideas
* 'I really like the different colours that you have used, I think that it makes it eycatching and unique'
* 'The title is very clear and effective'
* 'The way that you have layered the photo's up showing different emotions, is very deep and effective'
* 'I think that this poster needs more information on it such as the releasing date and the sponsors logo's'
* I think that the title could be too much and because the their is so much going on in the main image, i think that by having a simple title would make the poster more effective'
* 'I think that you could experiment with the colours of the titles, you should try more vibrant colours to make it more eye catching for the audience'
* 'This is just a photo it needs more context to show its for a music video, you should add a title and the bands name'
* 'I like how you have really contrasted this photograph it makes it very effective and bold'
* 'I think that this could make a good poster because it would be simple but effective'
Thursday, 23 February 2017

Wednesday, 22 February 2017
Trouble with editing


Editing (slowing down the footage)


Editing in progress
 I have started started to edit the chorus drumming sequence, for this I want the editing to be slick and fast and for the editing to be on the beat to make it more effective. I also thought that putting in a flicker of colour it will make the sequence bolder and more eye catching for the viewer. As you can see their are a lot of small clips that i have cut up in order to create the glitch effect, I think that this looks really good i just need to finish it. I have had some problems with this as some times it doesn't play properly and other times it doesn't play at all. I think that i am having this problem because their are so many different effects that the video can't handle to do everything at the same time. But when i export the video it works and it is a very effect technique.
Tuesday, 17 January 2017
Filming in the Main Hall and Risk Assessment
 so today I manage to film some more footage for my music video. Today I filmed in the main hall, here I used the studio lights to create some more running footage. I have chosen this location because when filming the running sequence it makes you focus more on the main protagonist rather that the surrounding. another good reason for filming here is when you use the lights on the character it creates shadows and the shadows give the video more edge and a different dimension. Whilst I was filming I also took photos for my CD cover.
|
Risk
|
High/ Medium/ Low risk
|
How to get over it
|
|
Slippery surfaces could slip over whilst running
|
Low
|
Make sure my actor has grippy shoes on and ensure that I
the stage is clean and has no water on it.
|
|
The actor could run into objects around the stage
|
Medium
|
Ensure that the stage is cleared and do the filming in the
middle of the stage so that the protagonist doesn’t run into the wings.
|
|
The cables in from the lights could get in the way and
someone could trip over them.
|
High
|
Make sure that the wires are out of the way and make sure
that all the people at the shooting are aware of where the cables are.
|
Give everyone at the shoot and tell them what the dangers
are and how to make sure that no accidents happen.
Subscribe to:
Comments (Atom)